Custom Zone Making
Currently, one of the most developed ways to do custom zones is with the OpenZone tool. There are many tools available to export original EQ zones to various formats, but making zones is an area not as heavily developed.
Making Zone Options
OpenZone supports the following flows to import and generate zones:
| Flow | Ext | Pros | Cons |
|---|---|---|---|
| OpenZone (.scn) | .scn | All features available | Very clunky, camera movement horrible, have to type in coordinates |
| 3d Studio Max | .3ds | Native modeling controls | Unverified if works with latest version, might have poly limits? |
| Quake 3 | .bsp | Ongoing updates, easy UI, free | TBD |
| Dungeon Builder | .3ds | TBD | TBD |
Quake 3 Map Import
To simplify the process of quake 3 bsp importing, I have a repo I set up here: https://github.com/demoncia/zones . You can alternatively download https://github.com/Garux/netradiant-custom and find a copy of openzone 8.3 to repeat the process, but the guide may be slightly different for you if you do so.
- Download a zip of https://github.com/demoncia/zones/archive/refs/heads/main.zip
- Extract to a path of your choosing.
- Start radiant.exe
- Your first start it may prompt for what game to use, use the Everquest option (it should be the only one).
- After clicking next, it'll ask where your game path is. Set it to the library/textures subdirectory.
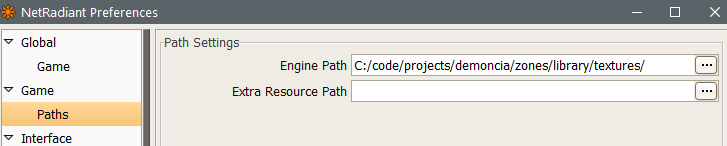
- If you skip above, or mess it up, go to the top menu select edit, preferences. here's a screenshot of how I have it set up when I have the project at c:\code\projects\demoncia\zones:
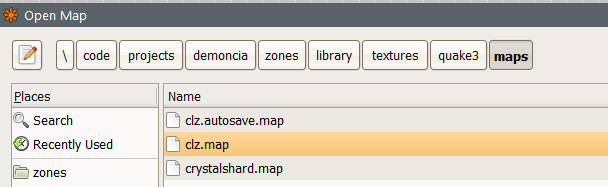
Click file, open. You should see my premade maps listed, like clz. Note the path, library/textures/quake3/maps of the dir you extracted radiant to. Click open
Your textures should load and look like this:
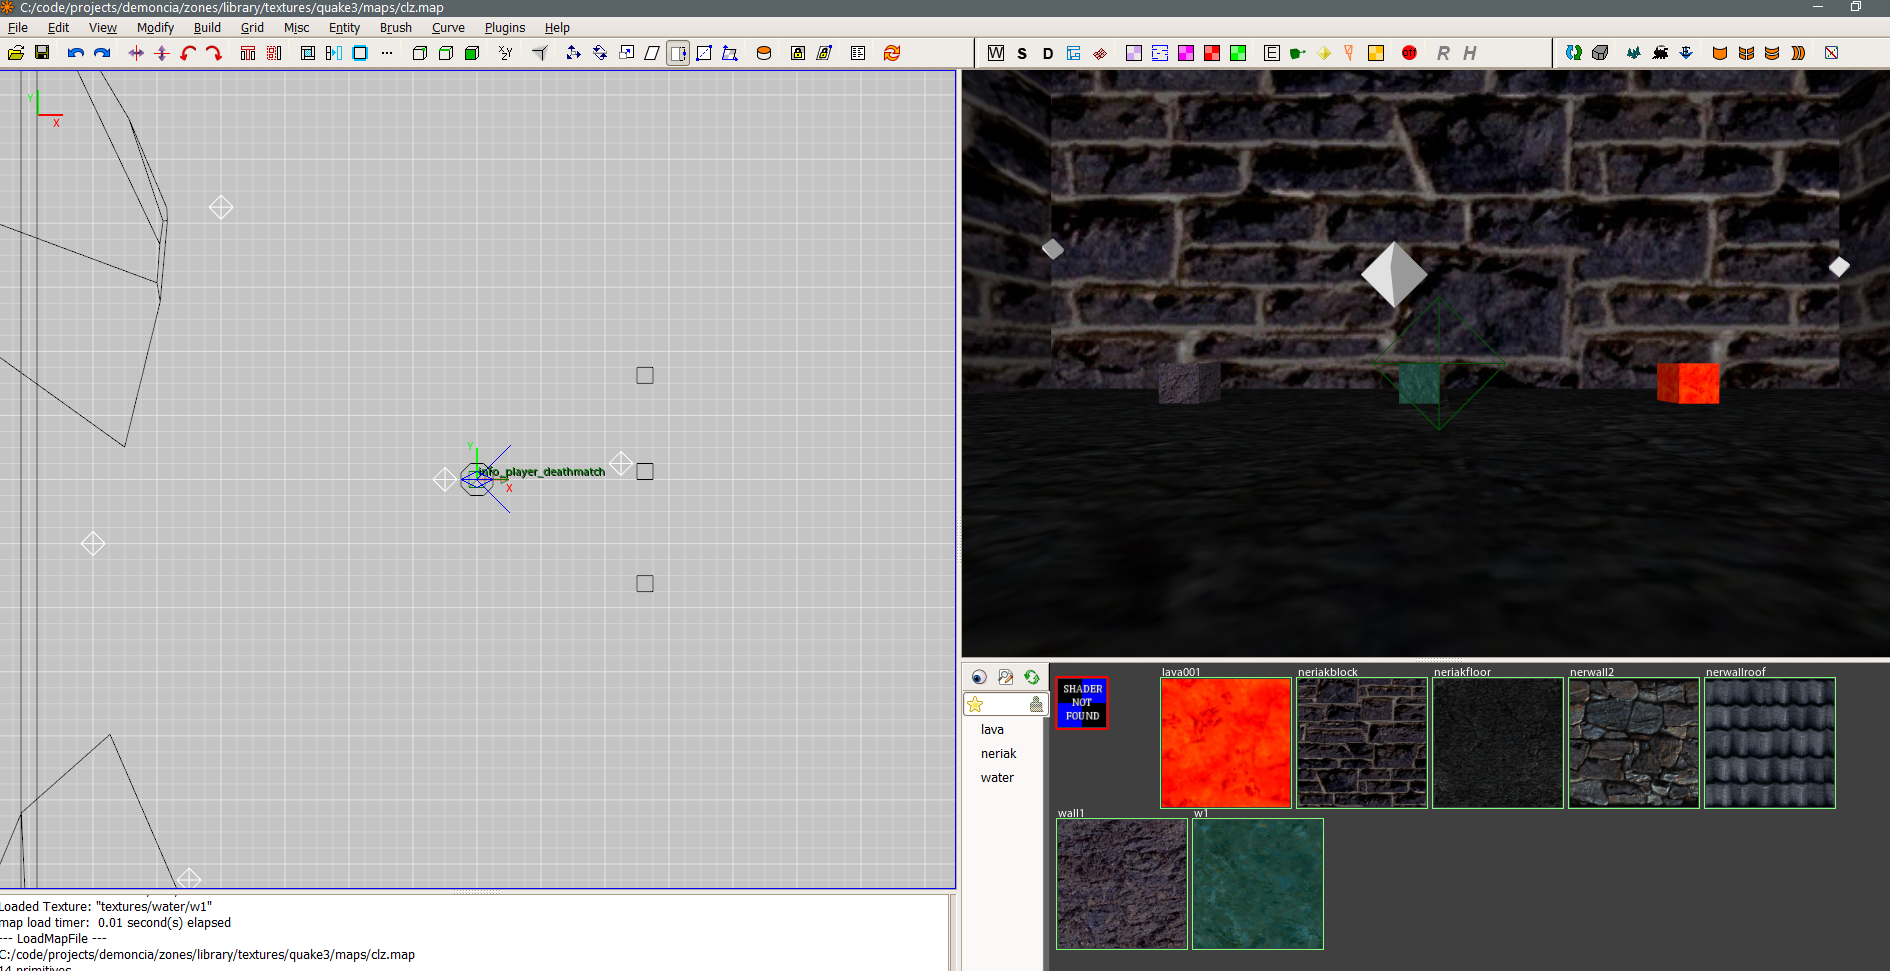
If all textures state Shader Not Found, review that your library/textures/quake3/ has maps, scripts, and textures subdirectories.
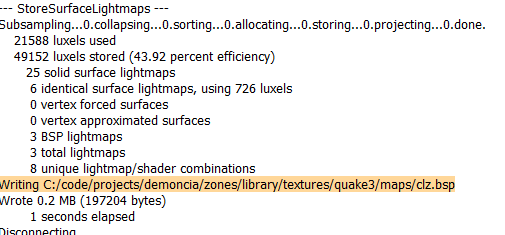
On the top menu, select build, (final). On success, a message such as the highlighted should appear:
Start openzone.exe. On the top menu, select file, properties. Select indoor for zone type, and shortname/long name to clz for now. Click OK

On the top menu, select file, import, Quake 3 Map... and browse for library/textures/quake3/maps/clz.bsp. You'll see a screenshot like below:
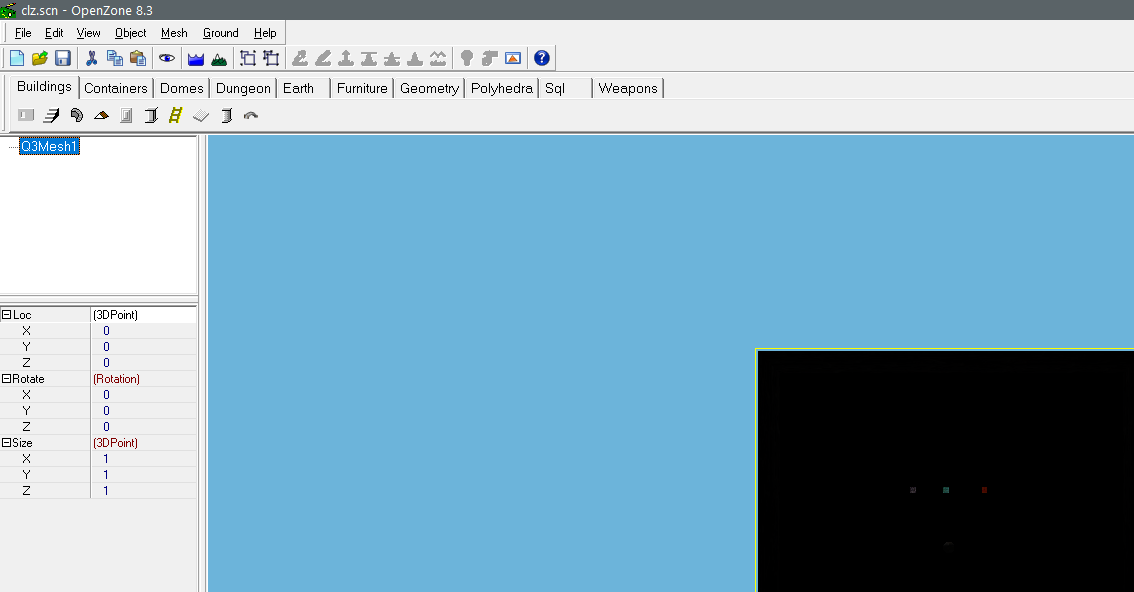
(If multiple q3Mesh1 entries exist on the top left hierarchy, select one and press the delete key, and confirm. Any time you import, you'll want to delete the old mesh)
On the top menu, select file, export, Export to s3d... Enter new zone name: clz. click ok through each message.
In your zones subdir you'll see a list of various files. For now, you are only interested in the s3d and eff files.
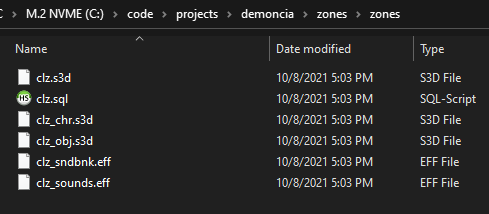
Copy these files to your everquest directory, overwriting the original clz.s3d.
Start everquest, and see if your loading screen changes. If it does, you have successfully made a custom zone!