Install PEQ Database Editor
Info
If you do not need to run your own editor, you can simply use the publicly available version of the PEQ Database Editor found at eoc.akkadius.com. Input the settings for your server on the Login page and be sure to follow the on-screen instructions.
Documented Setups by OS:
Unix-like System Installation Instructions
These instructions are intended to be used on a freshly installed server. Some services may have been enabled on your server when the provider installed the image. You should still be able to reference these steps to configure your server.
CentOS
Enable the appropriate MySQL Repo.
yum localinstall https://dev.mysql.com/get/mysql57-community-release-el7-11.noarch.rpm
Install MySQL.
yum install mysql-community-server
Open the MySQL configuration file for edits.
nano /etc/my.cnf
Configure MySQL to list on all IPv4 addresses by adding the following lines to your configuration file. Save your edits.
# Bind Address
bind-address=0.0.0.0
Enable the MySQL server executable to run on startup.
systemctl enable mysqld
Start the MySQL server.
systemctl start mysqld
Verify that all went well by checking your MySQL version.
mysql --version
Enable the web server executable to run on startup.
systemctl enable httpd.service
Start the web server.
systemctl start httpd.service
Install the Yum Utilities package.
yum install yum-utils –y
Install Extra Packages for Enterprise Linux.
yum install epel-release –y
Set your configuration parameters to use PHP7+.
yum-config-manager --enable remi-php71
Install PHP packages.
yum install php php-common php-opcache php-mcrypt php-cli php-gd php-curl php-mysql
Locate your loaded PHP configuration file.
php -i | grep "Loaded Configuration File"
Open your PHP configuration file for editing (using the path indicated in the previous step).
nano [path]php.ini
Use the find command (ctrl+w) to locate the configuration parameter for short open tags.
# Set short_open_tag to ON
short_open_tag = On
Also look for error_reporting to turn turn off some warnings.
error_reporting = E_ALL & ~E_NOTICE & ~E_STRICT & ~E_DEPRECATED
Navigate to the directory where you want to install the PEQ Database Editor and clone the GitHub Repository (i.e. /var/www/html).
git clone https://github.com/ProjectEQ/peqphpeditor.git
Navigate to the main PEQ directory and create a copy of the PEQ Database Editor configuration file.
mv config.php.dist config.php
Edit the configuration file and input your settings.
nano config.php
Navigate to the sql directory. The files that you find in this directory contain queries that you will need to run on your database prior to using the PEQ Database Editor. You can open these files and then copy / paste the queries into your database editing client.
nano schema.sql
Repeat this process for any remaining files in the sql directory.
Point your web browser to http://localhost/<editor-directory>/index.php and login. The default username / password are "admin", and "password".
MacOS
Install Xcode.
- Click the Apple Icon in the upper-left corner of your screen⋅⋅
- Choose App Store...
- Search for Xcode
- Install Xcode
Install Command line tools for Xcode.
xcode-select --install
Install Homebrew.
/usr/bin/ruby -e "$(curl -fsSL https://raw.githubusercontent.com/Homebrew/install/master/install)"
Install MySQL (v5.7)
brew install mysql@5.7
Install PHP (v7.1)
brew install php@7.1
Verify that the appropriate version is running.
php --version

Locate your loaded PHP configuration file.
php -i | grep "Loaded Configuration File"
Open your PHP configuration file at the path indicated in the prior step.
nano /etc/php.ini
Use the find command (ctrl+w) to locate the configuration parameter for short open tags.
# Set short_open_tag to ON
short_open_tag = On
Also look for error_reporting to turn turn off some warnings.
error_reporting = E_ALL & ~E_NOTICE & ~E_STRICT & ~E_DEPRECATED
Navigate to the directory where you want to install the PEQ Database Editor and clone the GitHub Repository (i.e. /Library/WebServer/Documents/).
git clone https://github.com/ProjectEQ/peqphpeditor.git
Navigate to the main PEQ directory and create a copy of the PEQ Database Editor configuration file.
mv config.php.dist config.php
Edit the configuration file and input your settings.
nano config.php
Navigate to the sql directory. The files that you find in this directory contain queries that you will need to run on your database prior to using the PEQ Database Editor. You can open these files and then copy / paste the queries into your database editing client.
cd sql
nano schema.sql
Repeat this process for any remaining files in the sql directory.
Point your web browser to http://localhost/<editor-directory>/index.php and login. The default username / password are "admin", and "password".
Ubuntu
Big thanks to Gloat for running through this, and RedVapor for some example sed scripts and greps!
Info
If you can skip having to sudo each line with (sudo -i or sudo su) it can save a lot of sudo's
Install MySQL
sudo apt install mysql-server
Configure MySQL. Start by going to the default install directory
sudo nano /etc/mysql/mysql.cnf
Look for the Bind-Address section and set MySQL to listen on all interfaces
# Bind-Address
bind-address=0.0.0.0
Enable MySQL to run at startup
sudo systemctl enable mysql
Start MySQL
sudo systemctl start mysql
Check that everything installed correctly
mysql --version
Install Apache
sudo apt install apache2 -y
Enable Apache to run at startup
sudo systemctl enable apache2.service
Start Apache
sudo systemctl start apache2.service
Info
You can point your browser to the ip address to make sure webserver is working at this point.
Install PHP
sudo apt install php php-common php-opcache php-cli php-gd php-curl php-mysql
Look for your loaded PHP configuration file
php -i | grep "Loaded Configuration File"
Info
There are a number of other different methods to find your php.ini file(s), such as using grep to search for the setting of interest:
grep -r short_open_tag /etc/php/
Edit your PHP configuration file (example file location used shown below)
sudo nano /etc/php/7.2/apache2/php.ini
Info
If you'd rather not use an editor to make the adjustments, a simple sed script can make them for you (an example for php v7.3 is below):
sudo sed -i 's/short_open_tag\ =\ Off/short_open_tag\ =\ on/g' /etc/php/7.3/apache2/php.ini
sudo sed -i 's/short_open_tag\ =\ Off/short_open_tag\ =\ on/g' /etc/php/7.3/cli/php.ini
Search (ctrl + W) for "short_open_tag"
short_open_tag = On
Also look for error_reporting to turn turn off some warnings.
error_reporting = E_ALL & ~E_NOTICE & ~E_STRICT & ~E_DEPRECATED
Install Git
sudo apt install git -y
Go to your root web directory
cd /var/www
Clone in a copy of the PEQ Database Editor repo
git clone https://github.com/ProjectEQ/peqphpeditor.git
Copy the PEQ Database Editor to your html directory
sudo cp -ir peqphpeditor/. html/
Go to your html directory
cd html
Create a copy of your PEQ Database Editor Config file
sudo mv config.php.dist config.php
Open your config file for editing and input your settings
nano config.php
Info
Depending on your environment, you may need to change ownership of the web directory. An example is below (your user:group IDs might be different):
sudo chown -R www-data:www-data /var/www/html/
Info
After all of these changes, it might be a good idea to restart Apache:
systemctl restart apache2
Execute the queries found in the sql directory on your database
cd sql
mysql -u<username> -p <database>
source schema.sql;
quit
Point your web browser to http://localhost/<editor-directory>/index.php and login. The default username / password are "admin", and "password".
Windows
Thanks to Korinthian for walking through these steps and providing screenshots!
Download XAMPP
XAMPP is a completely free, easy to install Apache distribution containing MariaDB, PHP, and Perl. The XAMPP open source package has been set up to be incredibly easy to install and to use.
You can download XAMPP at: https://www.apachefriends.org/index.html
Install XAMPP
Run the installer for XAMPP. Choose continue when you receive the Windows Firewall warning, and continue to install XAMPP.
Choose OK to approve the User Account Control (UAC) permission.
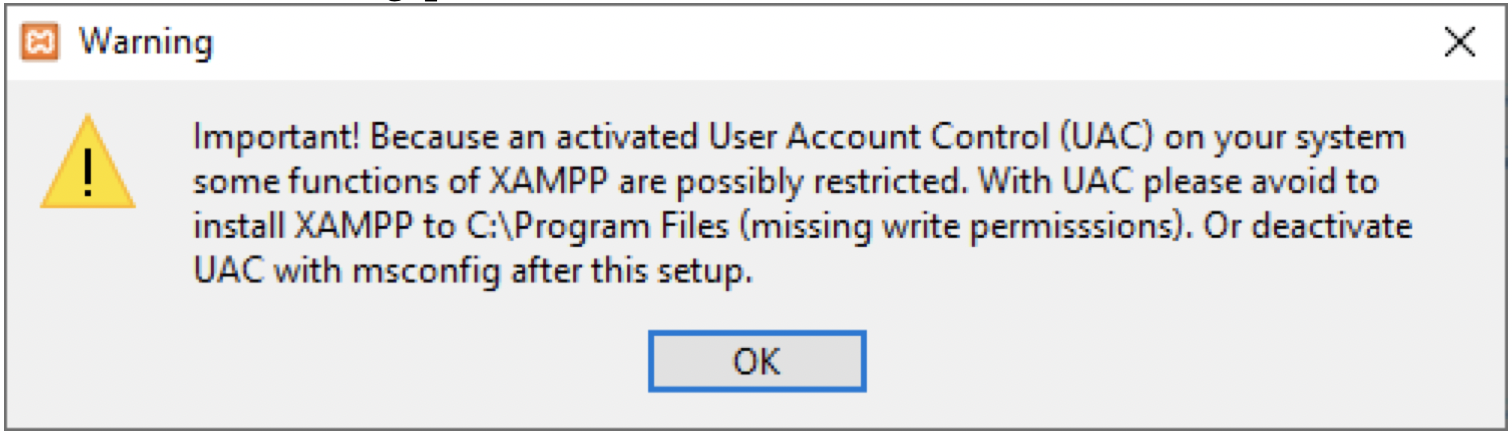
Warning
Be sure to **deselect **MySQL!! (assuming you used the Akkadius EQEmu Server Installer, you already have MariaDB)
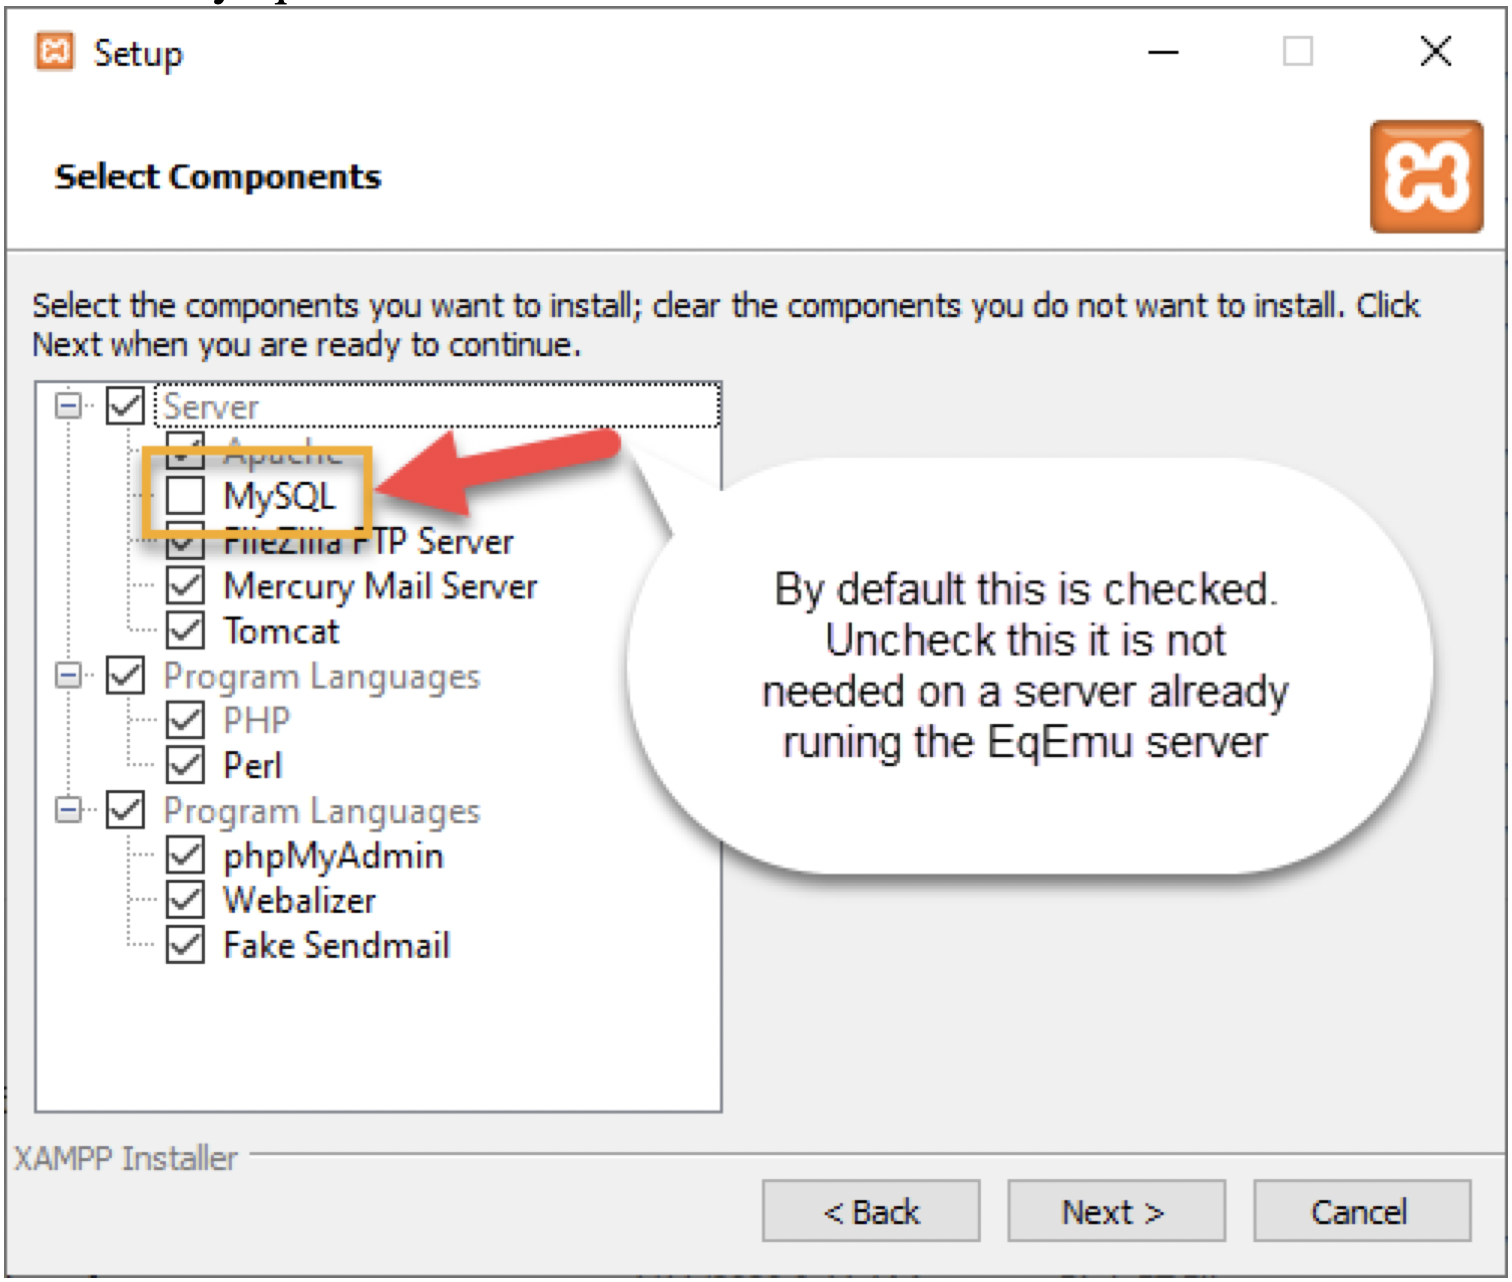
Choose next to continue installation.
Choose next to use the default installation directory (C:\xampp).
Choose your language settings and click next.
Uncheck the learn more box for Bitnami (unless you want to learn more about Bitnami, in which case a browser window will open).
Choose next to complete the installation.
Check the Start Control Panel option and Finish.
Click Start to start Apache.
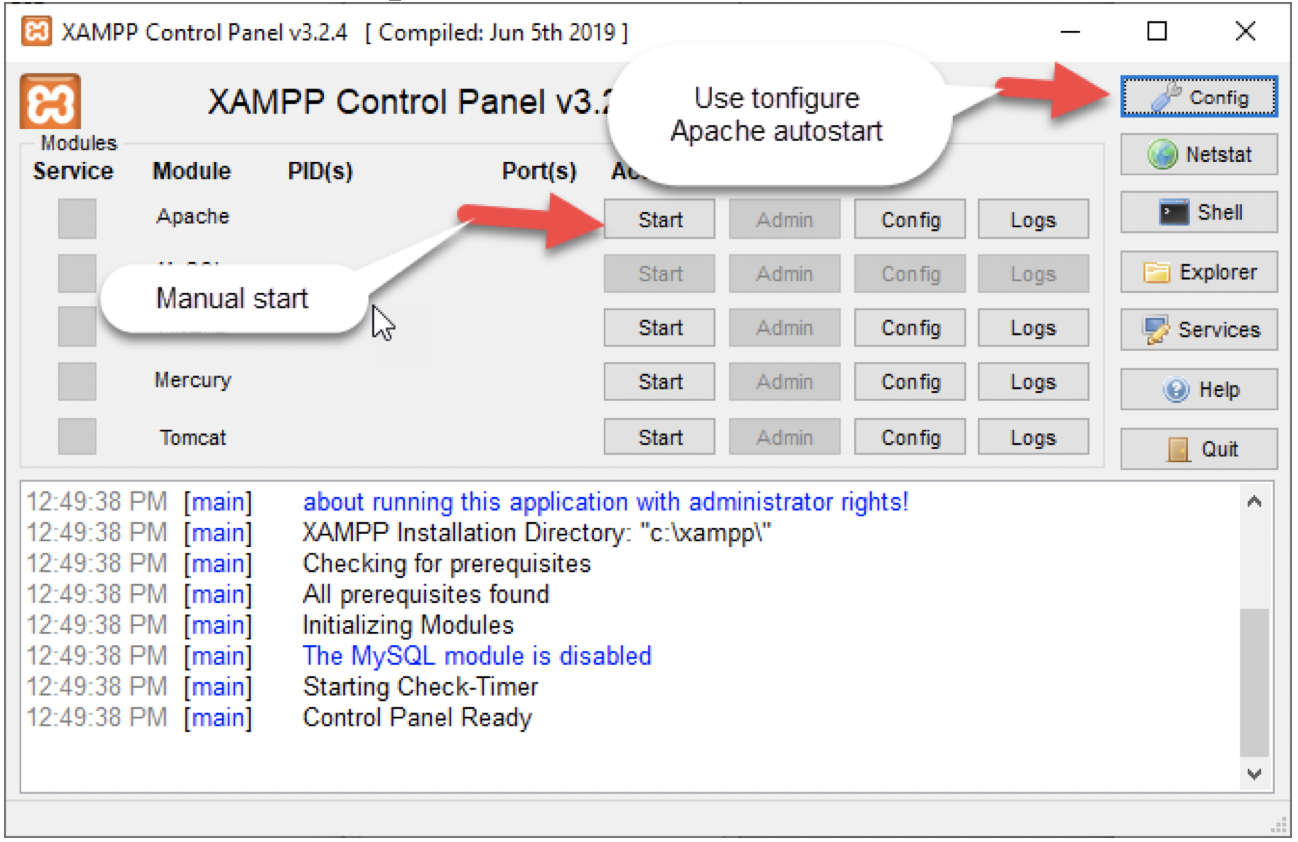
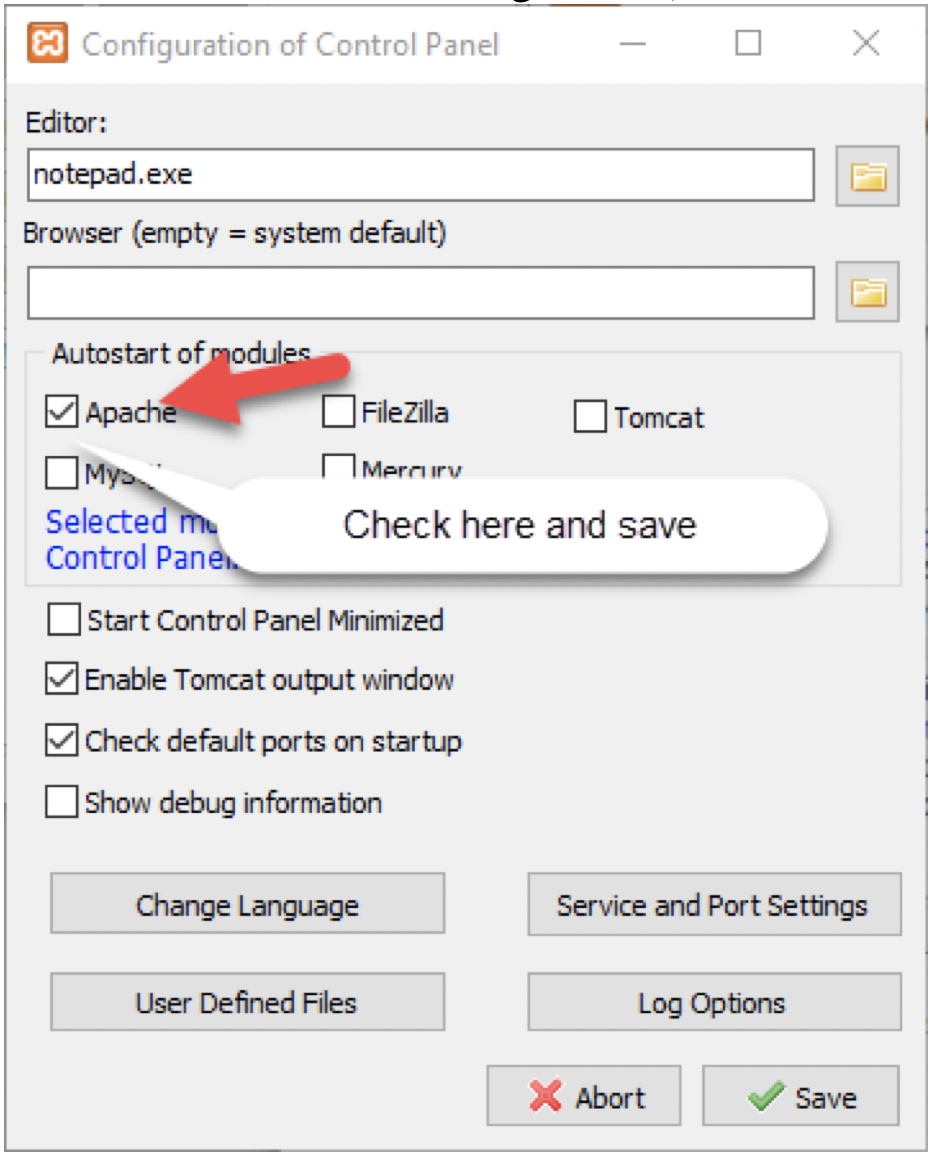
Info
If you want to configure Apache auto-start, click on config (you will need to exit the control panel and restart as Admin to save the configuration).
Install PEQ Database Editor
Download a copy of the PEQ Database Editor from GitHub: https://github.com/ProjectEQ/peqphpeditor
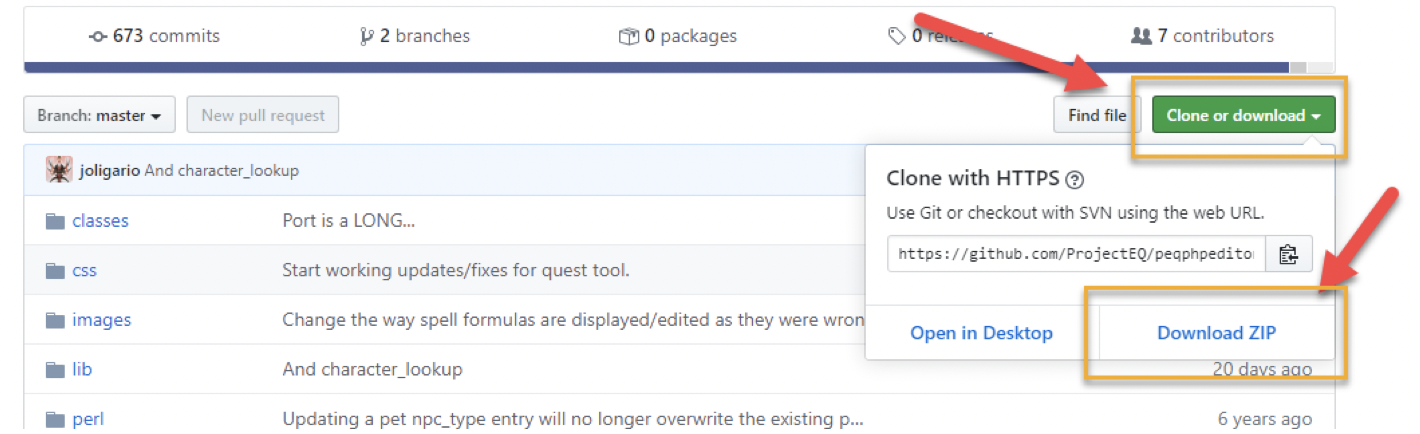
Extract the contents of the zip file to `C:\xampp\htdocs.
Info
If you would like to change the name of the PEQ Database Editor directory, now is the time. Note that you can move the contents to the root htdocs directory. Changing this name will effect the URL used to access the Editor.
Navigate to the `C:\xampp\htdocs\peqphpeditor-master folder.
Copy the file config.php.dist and rename it config.php.
Configure PEQ Database Editor
Open the config.php file with a text editor and fill in your information (default values used below).
Info
If you don't know your login information, remember that you can reference it in your eqemu_config.json file found in your server folder.
/**
 * Database info
 */
$dbhost = env('DB_HOST', 'localhost');
$dbuser = env('DB_USER', 'root');
$dbpass = env('DB_PASSWORD', 'eqemu');
$db     = env('DB_NAME', 'peq');
$dbport = env('DB_PORT', 3306);
Save your changes to the configuration file.
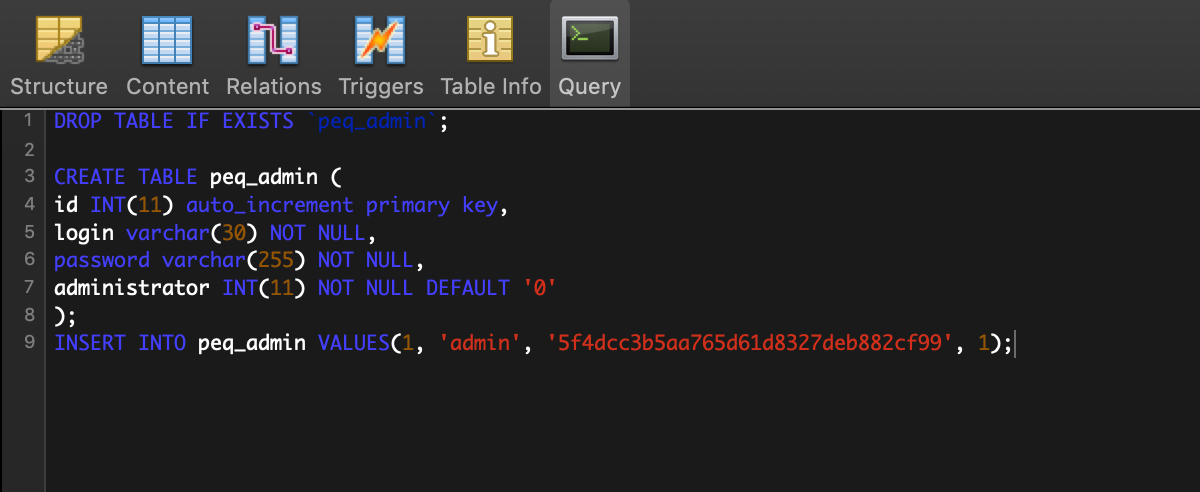
Update Database Schema
Navigate to the sql folder (ex. `C:\xampp\htdocs\peqphpeditor-master\sql\
Open the file schema.sql with a text editor and copy and paste the contents into the HeidiSQL Client's query window and execute (HeidiSQL installed when you used Akkadius' EQEmu Windows Installer Script).
Configure PHP
Navigate to the PHP folder (i.e. C:\xampp\php)
Open the php.ini file with a text editor.
Locate the short_open_tag line and set it to On.

Also look for error_reporting to turn turn off some warnings.
error_reporting = E_ALL & ~E_NOTICE & ~E_STRICT & ~E_DEPRECATED
Info
Restart (stop/start) your Apache service or process after any changes to .conf or .ini files
Navigate to your PEQ Database Editor
Open a browser and navigate to your new local copy of the PEQ Database Editor (default directory example below):
http://localhost/peqphpeditor-master/index.php
Enter the default username and password: "admin" and "password".
Info
When shutting down XAMPP and/or the computer, it is recommended to stop MySQL/MariaDB through the console rather than using the control panel. The reason is that the control panel just kills the process rather than letting the database shut down cleanly. Losing power or shutting down the database server using the control panel has been known to corrupt databases. The HTTP (Apache) server can be stopped from the control panel without issues.
Danger
If you aren't running MySQL/MariaDB as a service (i.e. you started the database manually), it is a good idea to shut down the database cleanly. To do this, open a command prompt (from the XAMPP control panel if you haven't added MySQL/MariaDB to your PATH variables) and run the following command (only use the -p if your root user has a password):
mysqladmin shutdown -uroot -p